Have you ever wondered what it would be like to make your own homemade pasta at home using your stand mixer? If so, read on because I’m gonna be doing a quick review on the KPRA Pasta Roller Set by KitchenAid.
Today, what we’re going to be doing is not making anything.
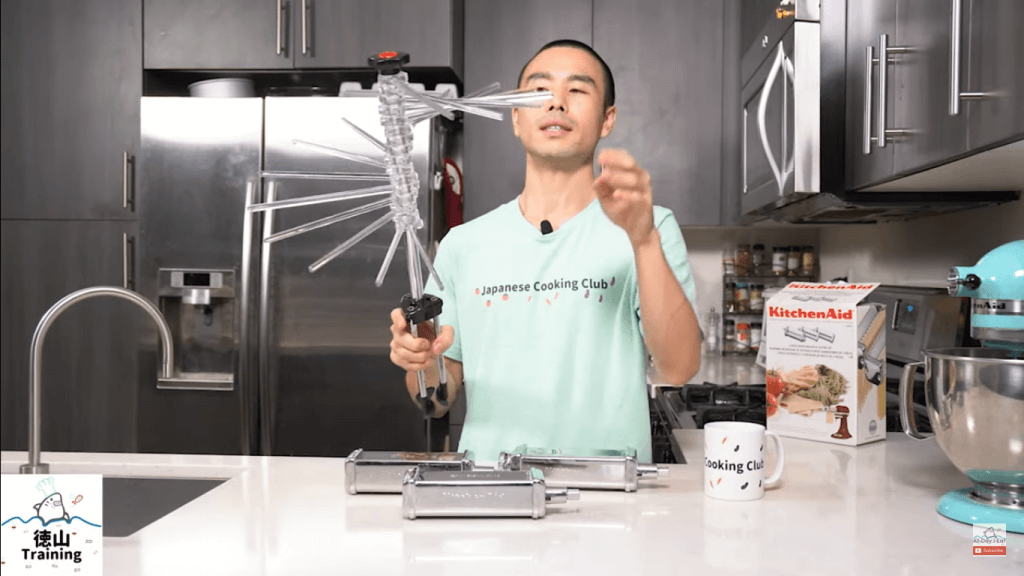
We’re gonna be doing a little product review for the KitchenAid pasta roller and cutting set.
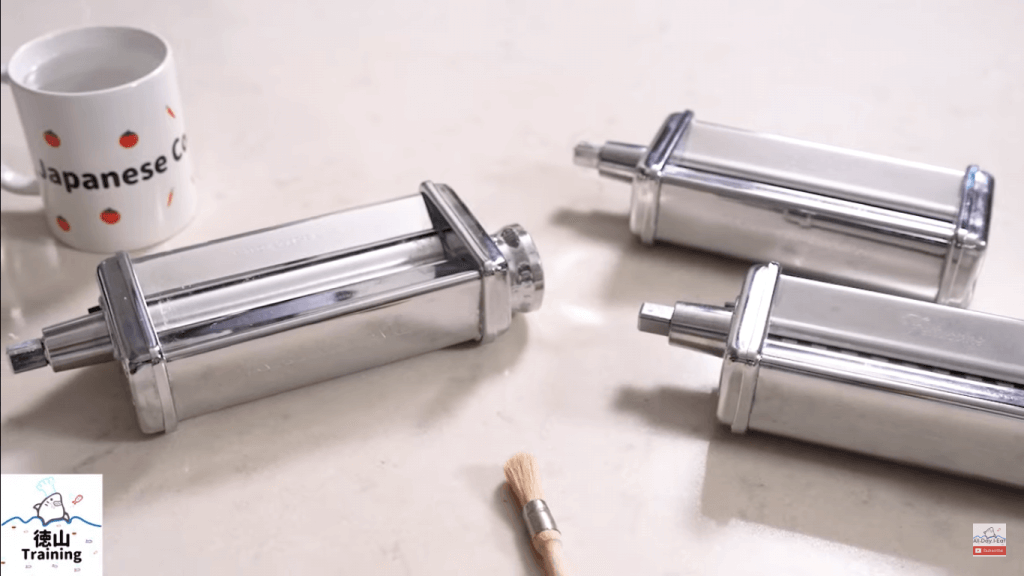
It’s basically a four-piece set that includes this little paintbrush here which is not really a paintbrush. It’s more of a brush to get off some of the excess flour and dried pasta, as well as a pasta roller, which is going to roll your pasta dough into sheets, and then a spaghetti cutter, as well as a fettuccine cutter.
That’s essentially it. I’ll be telling you all about my experiences using this, as well as some of the pros and cons, and a few tips that I have for you so that you can make your homemade fresh pasta a delicious success!

Why Get a Pasta Roller Set?
The reason why I got this — actually, I didn’t get it. It was a gift to me for Christmas.
My mom got it for me several years ago.
I’ve had this for a while and I’ve used it many, many times.
In fact, you can find some of the recipes for some of the pasta that I’ve made, fresh pasta that I’ve made with this set on my blog alldayieat.com.
Make sure to check it out if you want to see what I’ve made with it.
Fresh Pasta?
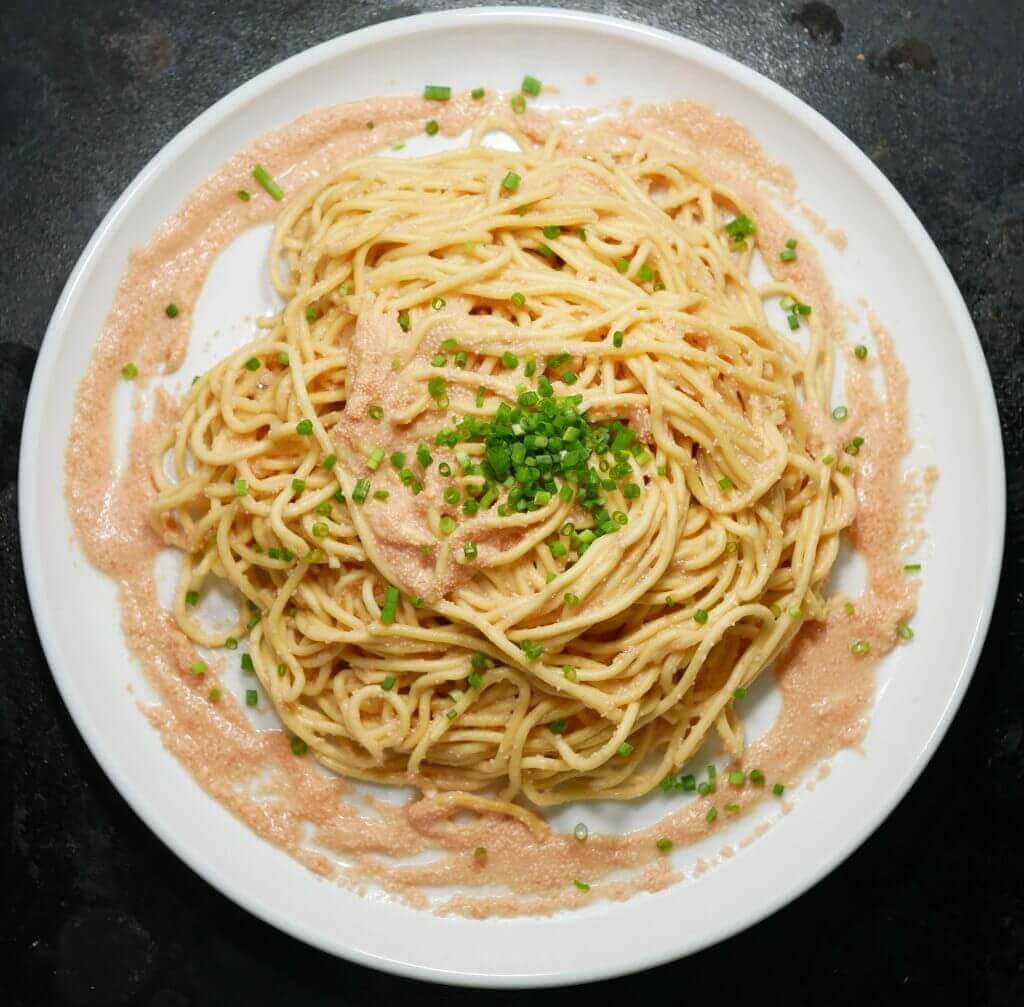
In terms of why would you want fresh pasta, I think it really comes down to texture and flavor.
If you’re making your own pasta, you can really control the texture.
You can experiment and try different flours. For example, home-milled flours. I actually got a grain mill earlier this year to experiment, not only with my bread-baking but also my fresh pasta. I mill my own flour at home, and that gives me a lot of flexibility in terms of the types of grains that I can use. I can have fun doing it while enjoying fresh pasta.
If that’s something that you’ve always wanted to do, maybe that’s something that you can try if you get this set.
And if you have any kind of KitchenAid stand mixer with a little hole in the front, then you can probably use this set. It doesn’t get any harder than that.
What Can You Make with These?
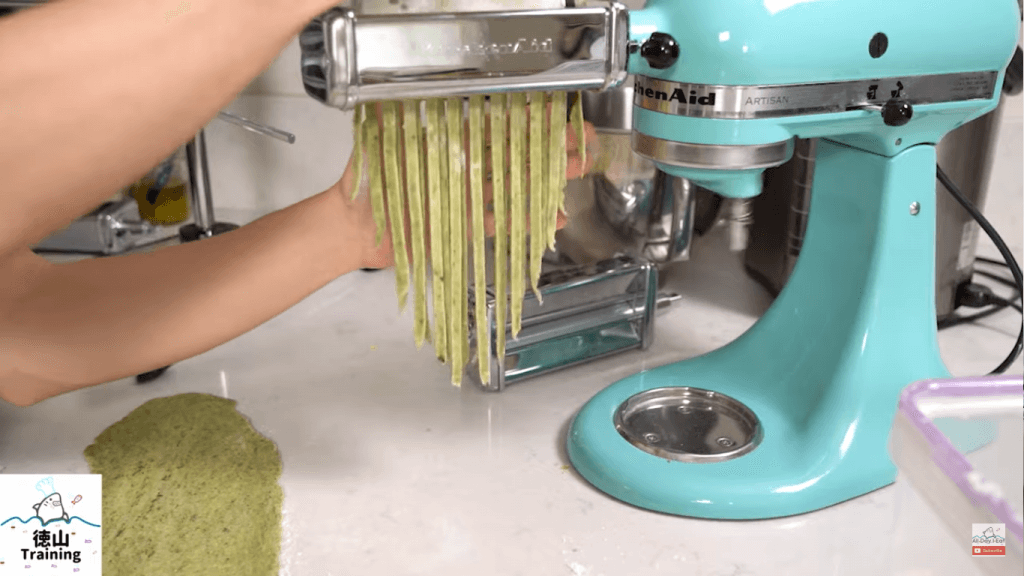
In terms of what it is that you can make with this, you have the roller that’s gonna give you sheets of pasta which you can use for lasagna.
You can do the fettuccine, and then the spaghetti as well.
And also, you can make Japanese noodles like ramen, as well as soba noodles. If you’re gonna be making those types of noodles, you’d want to use the spaghetti cutting attachment.
The hardest thing is probably getting the dough consistency correct.
And also, practicing how to use this took me a few times before I really got the hang of it.
But once you get the hang of it, you can make pretty much any kind of flat pasta, including spaghetti.
Cons of the KPRA Pasta Rollers
This is a very specialized device.
You can’t really do too much with it. Like I mentioned, you have spaghetti, fettuccine, and then the Japanese noodles if you’re gonna be making those, as well as the flat noodles like what you would use for lasagna.
The second con is that this is gonna take practice.
It’s not super-intuitive or simple to use but once you do it a few times, you’ll kind of know what to expect, especially in terms of what thickness you’re gonna be using it, what speed you’re supposed to be using on your mixer, and how to feed it without getting a mess on your counter, or getting a bunch of little uncut, irregular-shaped pieces of dough, which happened to me on the first few times I tried to make my fresh pasta. It’s gonna take practice.
If only it were easier to use, maybe more people would use the set. Who knows?
The third con is that it does require you to stand by your mixer while the dough is rolling out, and also while it’s cutting because you need to make sure that you’re gonna flour, especially the cut noodles so that they don’t stick to each other.
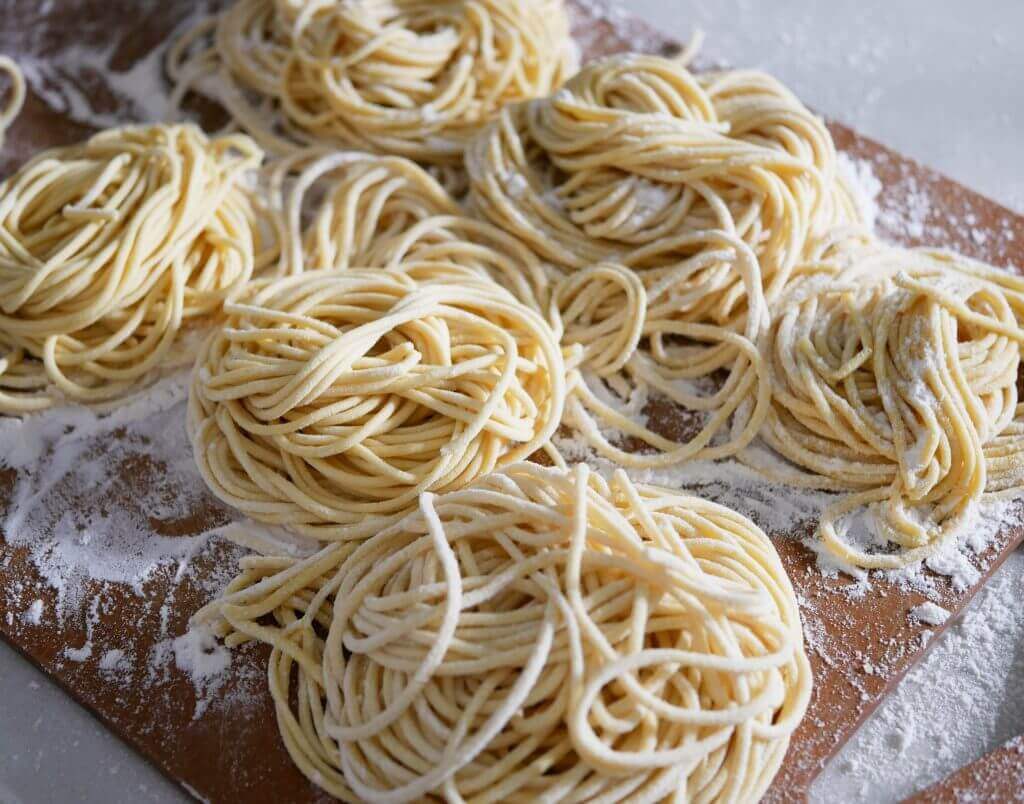
Because once they fall out, then they fall out. You got to be there to catch it, and put it into a little nest, or put it on to a pasta drying rack.
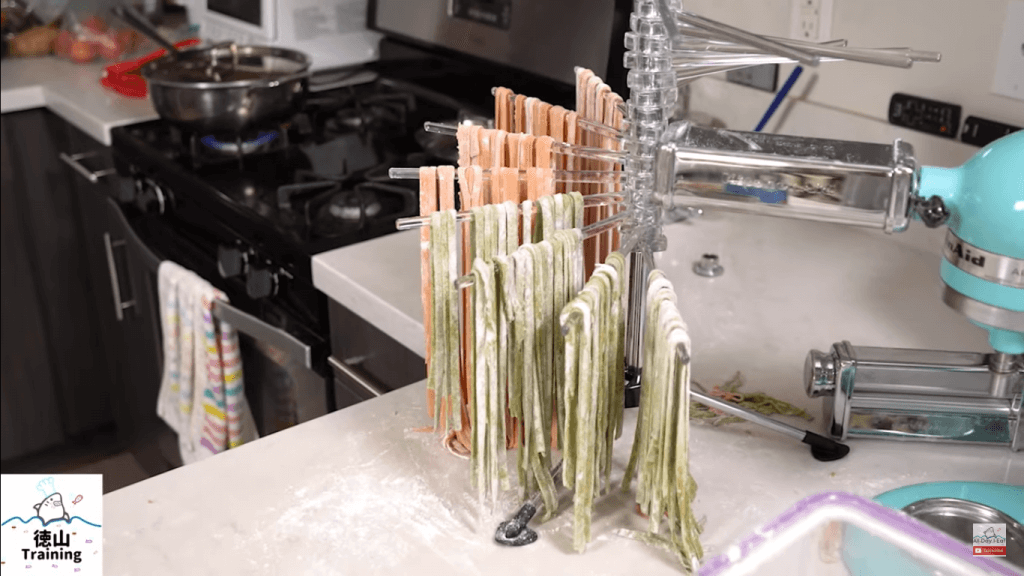
This pasta rack is definitely something that I recommend you try to use if you haven’t gotten one of these yet. You can get the one by KitchenAid, which is this one.
That’ll help you with your pasta-making because you can make a bunch of pasta all at once, and then you can dry it for future use or if you’re going to be cooking for a large number of people, you probably want to cook all that pasta once in a big pot, as opposed to doing it one by one.
That’s another reason why you might want to consider getting one of those pasta drying racks
The fourth thing is that even though this is made of stainless steel, there are some plastic pieces here.
Because I’ve had this for several years now, I’ve noticed that there are some little cracks that have developed on the bottom
I don’t know why they used plastic there. But it would have been nice if they used stainless steel for the entire thing
The fifth con is that you can’t dish-wash these. I usually just wipe it with a soapy sponge and a brush as well, which you can get off some of the dry bits of pasta.
I think I didn’t clean this well last time. There are a few flakes of dough. You want to make sure to get that off before you start a new batch so that your new batch doesn’t get affected and gets stuck in there, which has happened before.
You want to make sure you have very clean rollers, especially if you’re gonna be using a new batch of dough.
The last con is that it’s going to take time. Usually, I do about two to three pounds in batches, and it takes at least an hour to do all of that because these are somewhat small.
You can usually only do about a half-pound at a time, at least that’s how I divide up my dough.
So a 1/2 pound fits in here. I roll that out, do the other half-pound, roll that out, and then I cut both of them, and then I repeat it with the second or third batch.
I wonder if they could have made it like twice as big so that you could do a full pound. Maybe that would have been too messy. I don’t know, but that’s certainly a con in my eyes. And it does take a little bit more time than I think it should.
Pros of the KPRA Pasta Rollers
Now, let’s get into some of the pros.
One, I think it’s pretty simple to use. All you gotta do is attach it, and then feed it the dough.
It’s gonna take some practice as I mentioned. But once you get the hang of it, all the dough is pretty much the same.
And in terms of the cutting, once you have your desired thickness, then all you gotta do is feed it into the cutters, and out will come your noodles. Very simple to use.
The second thing is that these are relatively well-made. They’re very heavy. Aside from the plastic that I mentioned previously, I think these last a pretty long time. So I don’t really have any concerns about that.
Three, they’re simple to clean. Like I mentioned, you really need a brush only when there are little pieces that are stuck inside. Otherwise, you don’t really have to put them in the dishwasher. You’re not supposed to. And in fact, It says “Do not immerse in water” on all of these.
The fourth pro is that these three attachments are very good at what they do. The roller is very effective at rolling, the spaghetti cutter is effective at cutting spaghetti, as well as soba and ramen like I mentioned, and then the fettuccine is very effective at cutting fettuccine.
The fifth pro is that these don’t take up too much space. As you can see, I actually used the original box that it came in to store these, and I just put them above my stove right there.
And that’s about all the space that it takes, as compared to something that would be like a manual, a hand-crank where you’re going to be manually cutting the pasta out. That would probably take up at least two to three times as much space as one of these
Pro number six is that these are a little bit more effective and more efficient in my opinion than the Pasta Extruder set. If you’re looking at that and depending on the type of pasta that you’re trying to make, this might be a better option for you, especially if you’re just gonna be focusing on noodles like fettuccine and spaghetti, as well as if you want to make soba noodles or ramen noodles, this might be a better option for you.
It’s a little bit less fussy in my opinion because if you’ve seen the review for the KitchenAid Pasta Extruder set, you can see what I thought about that little attachment set and the constant cutting that you have to do for each set of noodles that it extrudes.
For this, this does the cutting for you. All you have to do is scoop it up and then put it into a nest, or put it on your drying rack.
The seventh pro is going to be that it fits with any KitchenAid attachment, or it fits with any KitchenAid stand mixer. It doesn’t really matter what kind or what size you have, but it should fit. That’s the good thing about using KitchenAid attachments.
Question of the day: Do you think that this pasta roller set has what you need to make fresh pasta at home?


Konnichiwa! (Hello!) I'm Pat Tokuyama, a Japanese tofu cookbook author, who travels for music, food, and adventure. If you like Japanese tea, checkout some of the newestorganic japanese tea, matcha bowls and noren and more!
** Curious about the Plant Based Japanese Cooking Club? ** Learn more here!
Tips for using the KPRA Pasta Rollers
Before we wrap up, here are a few tips that I have for using this particular pasta cutting attachment set by KitchenAid.
1. Use the recipe book that it came with. That’s what I started with, and I think that’ll give you a good feel of what you’re supposed to expect in terms of the texture. Not only of the dough but also of the final pasta once you’ve cooked it on the stove.
2. Experiment with different types of flour and ingredients like I’ve mentioned in my other videos and blog posts. Try putting vegetables like tomato, or spinach, or even some herbs like basil, or even shiso into your pasta because that’ll give it a nice, unique flavor that you can’t get anywhere else except for in your own kitchen because you made it.
3. Be patient with yourself. It took me a few tries to get the pasta right and to get used to using this. Not only with the speed, but coordinating the dough and cutting it. That’s gonna take some practice. So don’t get upset or angry if you can’t do it the first few times. I know it can be frustrating, but be patient with yourself. It’ll be worth it in the end.
4. Do large Quantities. As you may know, if you’ve done fresh pasta before, it does take a little bit of effort. It’s not as easy as opening a package and then boiling it on the stove. You’ve actually got to make the dough first. You have to let it rest, and then you have to roll it out, and then you have to cut it. It’s a lot more involved in terms of labor. But the flavor and the texture is unlike anything else.
Hopefully, you guys found this helpful!
[embedyt] https://www.youtube.com/watch?v=c4Gc-uzshIM[/embedyt]
Konnichiwa! (Hello!) I'm Pat Tokuyama, a Japanese tofu cookbook author, who travels for music, food, and adventure. If you like Japanese tea, checkout some of the newestorganic japanese tea, matcha bowls and noren and more!
** Curious about the Plant Based Japanese Cooking Club? ** Learn more here!